Here are two easy-to-understand ways to scan documents on the Epson L575 printer with its scanner feature. The most important step that must be done is to install a special scanner driver to scan.
Epson L575 is an All-in-One printer that you can use to print, scan and copy documents, even this printer is also equipped with Wi-Fi connectivity. Print and scan documents easily anytime and anywhere.
How to Scan Documents on the Epson L575
This is a way based on an easier experience of scanning on the Epson L575. Actually, there are many ways to scan this printer, but it depends on the drivers and applications that we use.
To scan this time I suggest you first download the Scanner driver below:
Epson L575 Scanner driver For Windows
Scanner Features Details:
Scanning: Color Scanning
Optical scanning resolution: 1200 x 2400 DPI
Maximum scan area: A4 / Letter (216 x 297) mm
Maximum scanning resolution: 9600 x 9600 DPI
Scanner-type: Flatbed scanner
 After placing your original document or photo on the product to be scanned, begin scanning using one of these methods.
Scanning Using the Epson L575 Control Panel
You can scan images using your product’s control panel buttons. Your product automatically selects the appropriate default scan settings, but you can view or change them as needed.
1. Make sure you install the product software and connect the product to your computer or network.
Note: Restart your computer after installing the product software to enable scanning from the control panel. Also, make sure the Event Manager program is not being blocked by your firewall or security software.
2. Press the up or down arrow button, select Scan, and then press the OK button:

3. Press the up or down arrow button to select a scan option, and then press the OK button. • The cloud sends your scanned files to the destinations you have registered with Epson Connect.
• The computer saves your scan as a JPEG file to your computer or as an image capture in OS X.
• Computer (WSD) allows you to manage network scanning in Windows 8.x, Windows 7, or Windows Vista (English only).
Note: To use this feature, you must first set up WSD (Web Services for Devices) in Windows 7 or Windows Vista computer that you want to scan.
4. To scan your computer, you must first select how to connect the product to your computer:
• If your product is connected directly to your computer with a USB cable, press the up or down button arrow keys to select USB Connection.
• If your product is connected to a computer via a network, press the up or down arrow button to select a computer name from the list and press the OK button to start the scan.
5. Press one of the Initiative buttons to start the scan.
Start Scanning from the Scan Program
You can start Epson Scan from a scanning program to select scan settings, scan, and open the scanned image in the program.
1. Open your scanning program and select the scan option. (See your scanning program’s help for
instructions.)
2. Choose your product.
Note: In some programs, you may first need to select your product as a “source”. If you see the Select Source option, go ahead and select your product. With Windows, don’t select the WIA option for your product; it will not work properly.
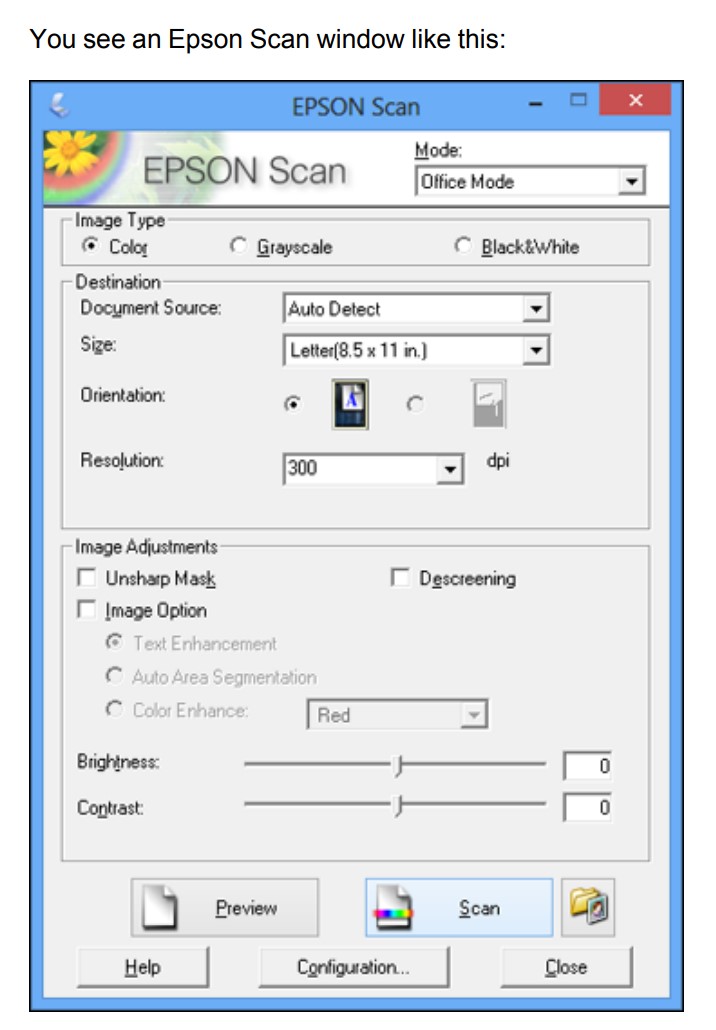
Note: Epson Scan may start in a different mode the first time you access it.